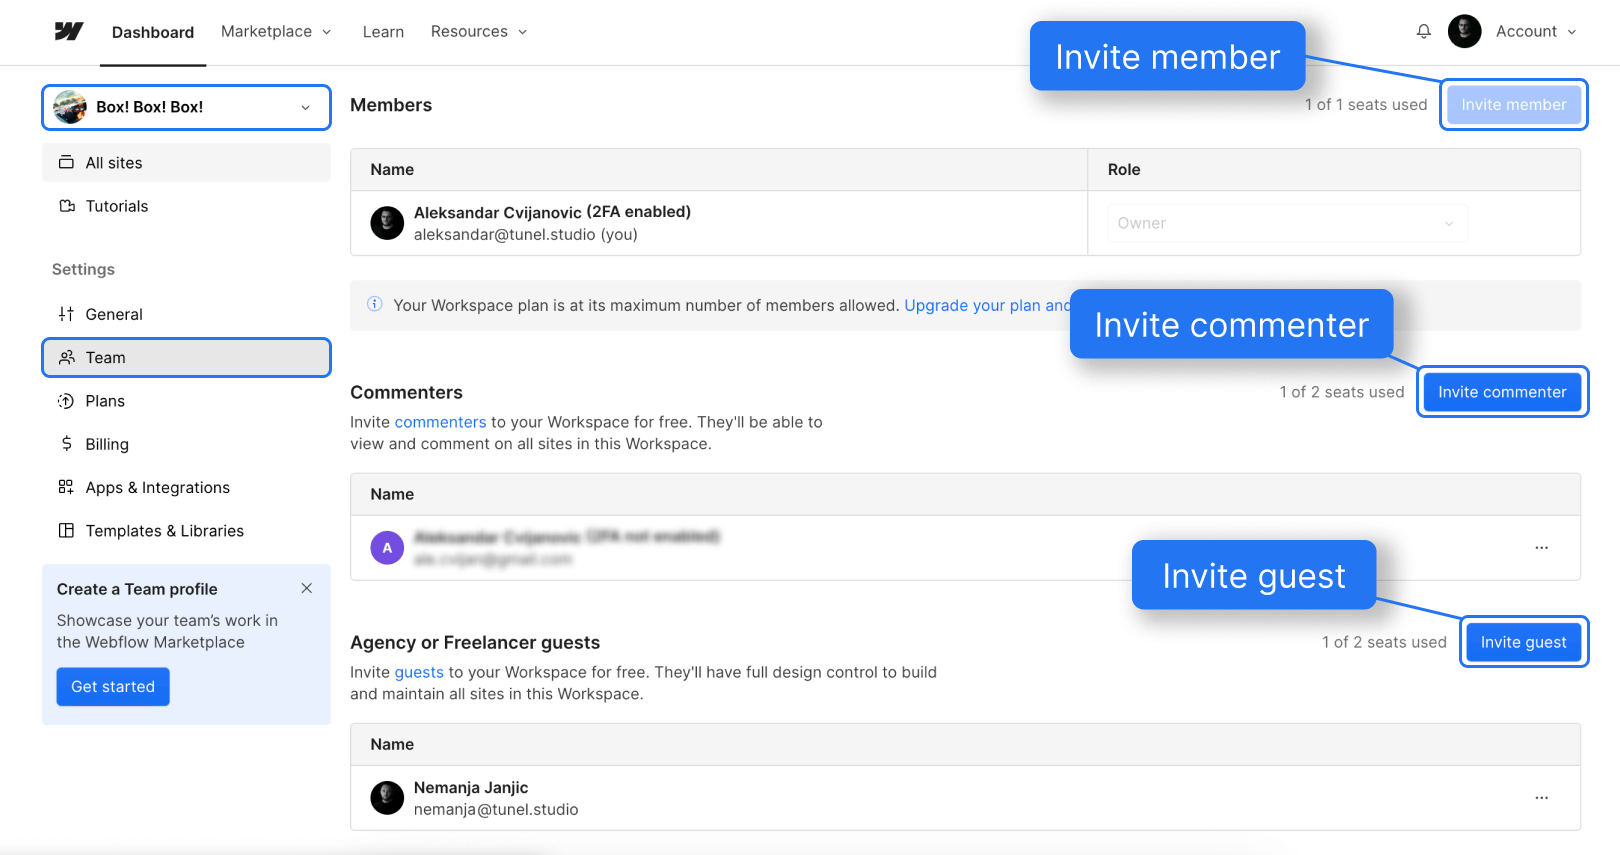
Inviting collaborators to your Webflow site is a straightforward process. Here’s how to get started:
- Log in to your Webflow Dashboard
- Navigate to your Desired Workspace
- In the settings section click on "Team"
- Invite a member, commenter or guest

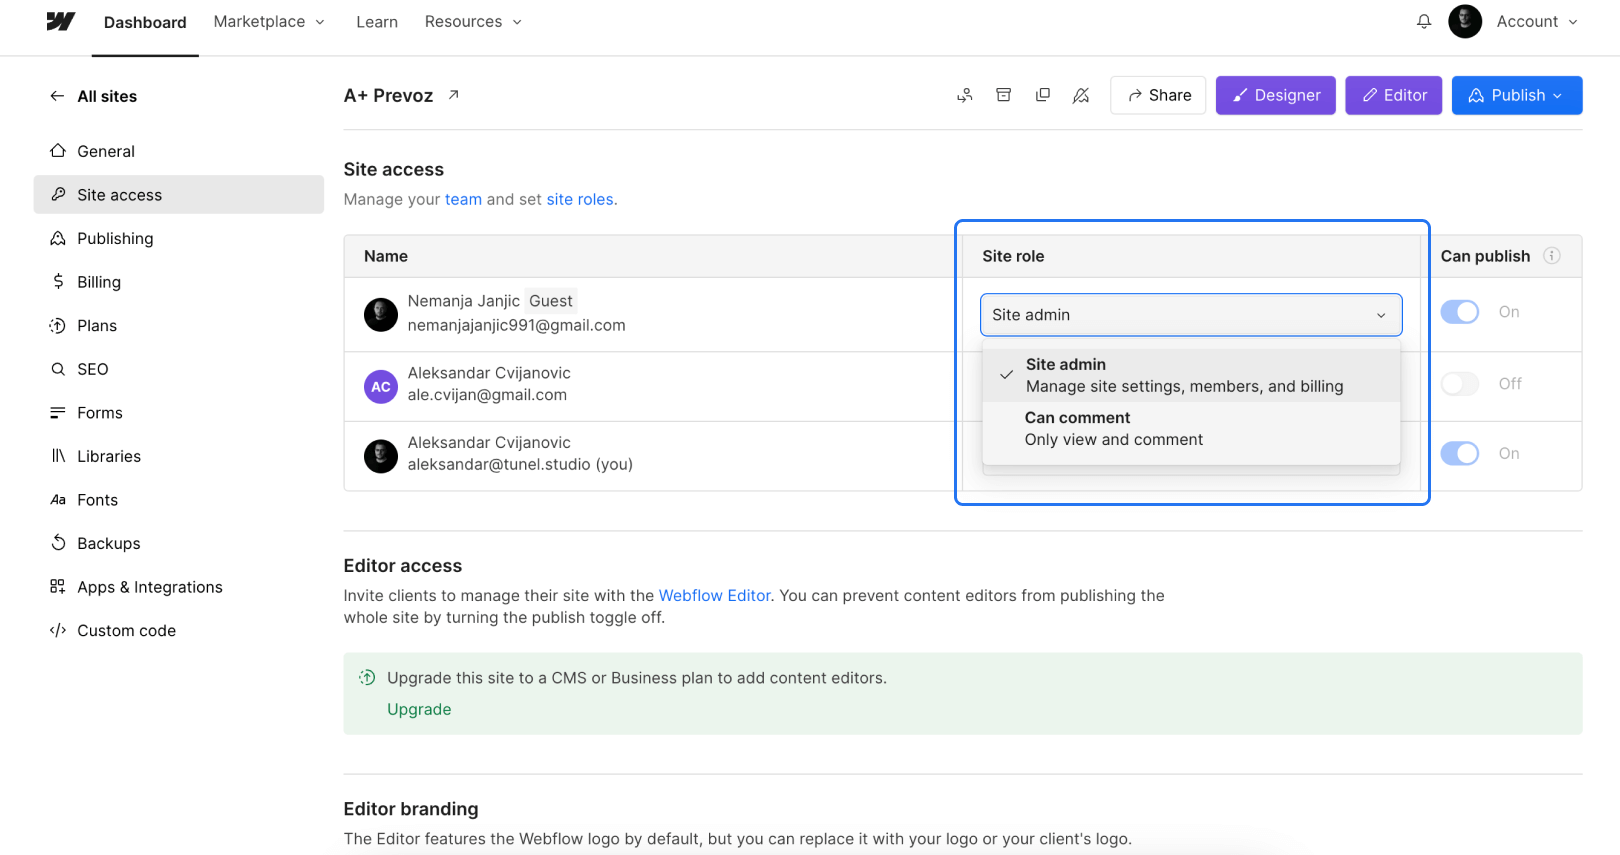
Furthermore, you can define what your collaborators can and cannot do. Here’s how to do it:
- Find your desired site and click on "Site Settings"
- Inside the site settings, click on "Site Access"
- Choose the appropriate “Site Role” for your new collaborator

In Webflow, you can tailor your collaborators’ roles and permissions on a workspace-level and on a site-level.
Workspace-level roles and permissions
Inviting someone to your workspace grants them visibility and certain permissions to all websites within that workspace. You can invite collaborators to have one of five workspace roles:
- Owner
- Admin
- Member
- Guest (Agency or Freelancer)
- Commenter
You can adjust your team’s roles and permissions in the "Team" section of your workspace settings. Guests and commenters can only be added and removed. For your members, you can change their roles from a dropdown menu.
Site-level roles and permissions
You can control what your collaborators can do on a site-by-site level. By default, all Workspace collaborators on your team (except commenters) are able to design and publish all sites in your Workspace. You can assign one of five roles to your collaborators:
- Site admin
- Can design
- Can design (Limited)
- Can edit
- Can comment
To manage site-level roles and permissions, navigate to the desired "Site Settings" and click on the "Site Access" section. From there, you can assign roles to your collaborators from a dropdown menu, ranging from Site Admin to Can Comment. This setup enables you to control what collaborators can do on a site-by-site basis, ensuring they have the appropriate level of access for their tasks. By default, all workspace collaborators, except those with a commenter role, can design and publish sites, with further customization available for administrative actions and publishing permissions.
How to remove collaborators from Webflow?
Removing collaborators from your Webflow projects or workspace is as easy as inviting them.
Here's the simple process to follow:
- From your Webflow dashboard, select the workspace from which you want to remove a collaborator and click on the "Team" tab.
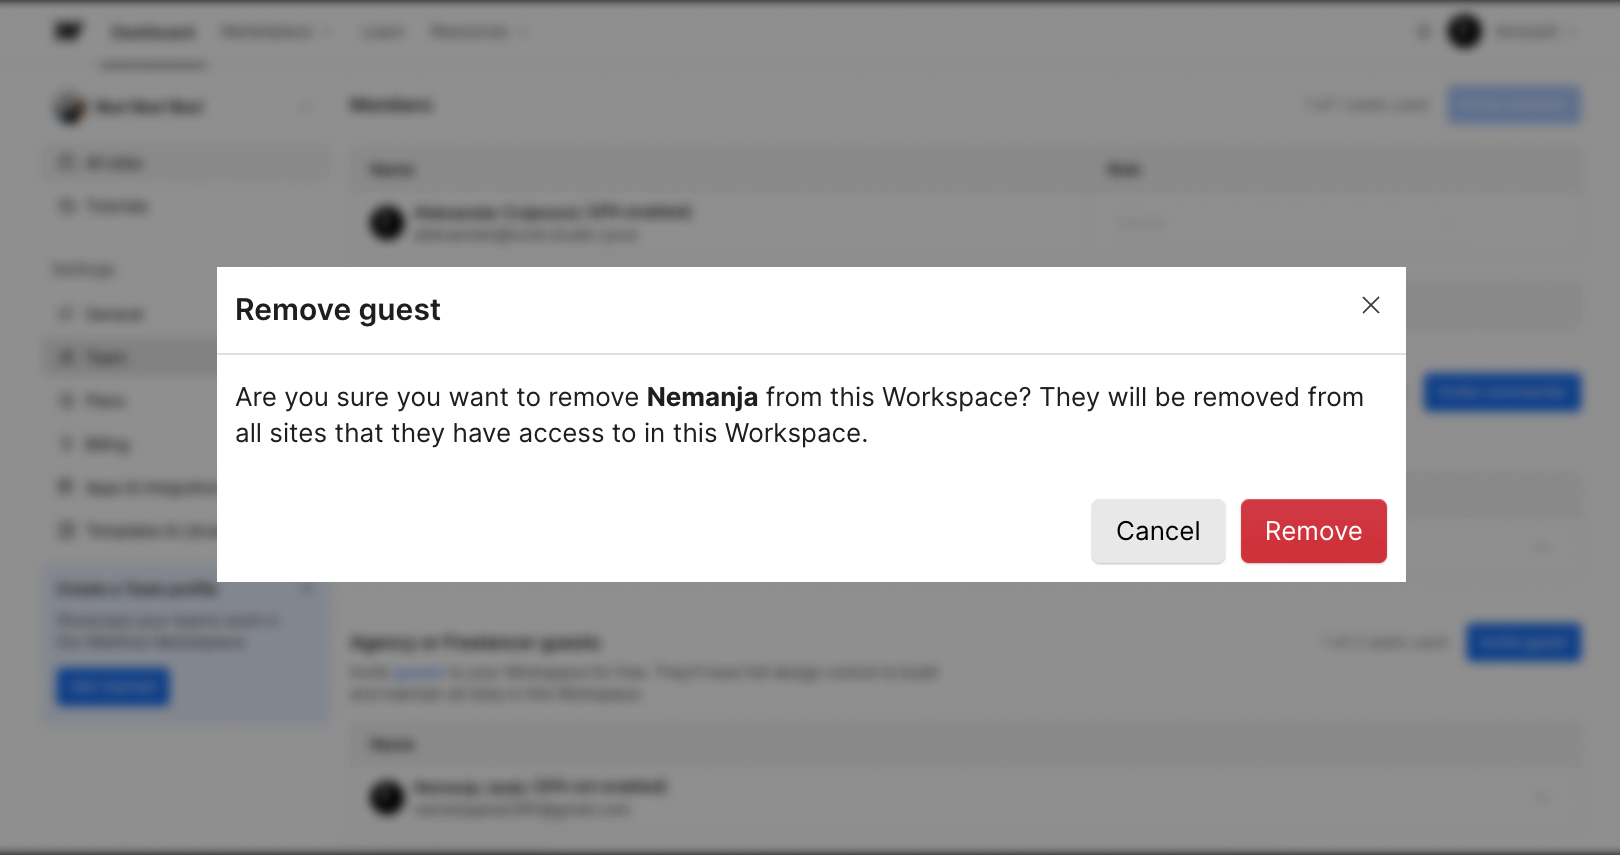
- Find the collaborator you wish to remove. Click on the options (three dots icon) next to the collaborator's name, and select "Remove" from the drop-down menu.
- Confirm your decision by clicking "Confirm" to finalize the removal of the collaborator from your workspace.

Conclusion
- Workspace Invitations: Easily invite collaborators across your Webflow workspace, providing access to all sites with roles from owner to commenter based on their involvement.
- Site Permissions: Simplify access at the site level, assigning roles from Site Admin to Can Edit for precise control over what collaborators can do.
- Ease of Management: Webflow makes adding or removing collaborators straightforward, ensuring you have full control over who can access and contribute to your workspace and sites.


